

How To Embroider Thick Jackets
Embroidery is the art of decorating your fabric using a needle to apply the yarn. It can be coupled with fancy materials like pearls, beads, quills, and sequins to improve the general outlook of your fabric.
It is not uncommon to find fancy embroidery designs on caps, hats, coats, blankets, dress shirts, denim, dresses, stockings and even handkerchiefs. A lot of the fanciest clothes have embroidery designs on them.
Learning to apply embroidery designs on your jacket is relatively easy. It is actually an easy and inexpensive hobby to adopt. I picked it up and ended up loving it. So, you can learn it too. This article contains detailed information on how to embroider your jacket. This tutorial is pretty easy to know, so I expect you to become a pro in no time.
How to Embroider Thick Jackets
Contents

You can either choose to apply embroidery with hand or by machine. Hand embroidery usually involves using a needle to thread decorative stitches on your coat. Basically, you use your threaded needle to draw beautiful designs on your jacket. Machine embroidery takes less time to make; however, you need experience to operate the machine.
Things You Need to Embroider a Thick Jacket by Hand

This is a relatively easy and inexpensive process. In terms of sewing supplies, you don’t have to spend much. To embroider your coat, you need:
- Your jacket
- Ruler
- Embroidery thread or floss; I recommend cotton embroidery floss.
- Embroidery hoop; There are many designs of embroidery hoops you can use, but a basic wooden or plastic circle is enough for this project. A 6-inch ring will serve you well for your embroidery projects.
- Needle. Like hoops, there are many embroidery needles made by different brands out there. Any needle big enough to insert embroidery thread through will work. However, the best option is to choose a pack of different sizes of special embroidery needle.
Note: The type of needle that will be used for this project must be able to move through your thick jacket seamlessly. It is recommended to use a needle size of 16-18.
- Drawing pen: Depending on your project, there are a few ways to make a pattern for your jacket, but tracing works best
- Water-soluble stabilizer
- Rubber thimbles: Safety first! Protect your fingers
Steps to Embroider Your Jackets
Here is how to apply an embroidery design on your jacket.
Step 1: Prepare your jacket
Before you do anything, I recommend you make sure the jacket you want to design on has been washed. If not, take a break and clean it. This is to ensure that your finished design won’t shrink and/or warp when you wash your jacket for the first time.
Step 2: Print your stencils
Print your stencil on your water-soluble stabilizer that will dissolve in the wash when you’re done with your jacket. Pick a stencil that doesn’t leave a trace. Also, you can print your design with a standard printer. Just make sure it is bold enough for you to see when you’re stitching over it.
Cut out the stencil, peel away from its paper backing, and stick it onto the part of your jacket you want to embroider.
If you want to embroider your jacket with your hands and your coat is soft, apply a blank stabilizer to your coat for some extra support while stitching. Or, if your denim is rigid enough, you can skip this step.
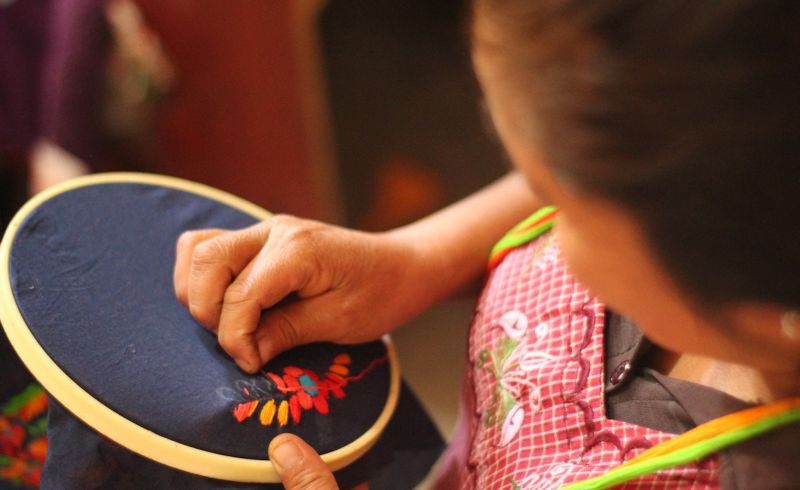
Step 3: Place your hoop on your jacket
The next step is to set the inner ring of your embroidery hoop under your jacket, making sure that your design aligns with the center of the circle.
Then, place the second ring of your hoop on top of your jacket and secure it down until it meets your first hoop underneath your coat. Make sure your jacket is held down across the ring, and tighten the two circles together with the adjustable screw
Step 4: Start stitching
Start by cutting a piece of your embroidery thread and threading it through your needle. Afterward, leave a “tail” a few inches long, and double knot the opposite end of your floss. You have several options to use for your stitches. Start this stitch by pushing your needle up through your jacket from the backside of your hoop. Pull the floss until you reach the knotted end of your thread.
Wear your rubber thimbles on your thumb and pointer finger. Stitching for an extended period through thick materials might make your fingers get sore. Hence, thimbles will help protect your skin as well as help you handle the needle more easily.
Insert your needle back down through your jacket at a small distance from your first hole, then let it come up again through the back, another few millimeters away. Then Insert your needle under your first stitch, and pull your string through. Then, put in your needle through the hole you just made, creating a looped stitch.
Step 5: Stitch your design

Bring your needle up through your jacket from the back once again, loop under your previous stitch, and put it through your starting point. Repeat as much as you like based on the number of stitches you want
Depending on your design, you might choose to use a solid design or an outline. To fill in a solid design, turn around, and stitch in the reverse direction so that the two lines of stitching touch. Or, stitch into space, fill it up.
I recommend that you check the back of your design repeatedly while stitching. Also, pull each stitch neatly and thoroughly, so don’t get tangled and messy at the end.
Step 6: Finish your design
End your stitch by pushing your needle under your last stitch and tying a knot before pulling tight. Do this twice each time to secure your design.
Your embroidery design is ready. That is all the necessary information you need to know how to imprint designs on your jacket.
Finishing Tips
Rinse your jacket with water to remove the marks made by this pen. This makes your embroidery design look neat and also eliminates creases. Then dry it with a towel and iron it gently.
Basic stitches that can be used for Embroidery
- Straight stitch: This simple stitch is so basic you probably already know how to do it without even learning it. Making short consecutive lines is something you’ll do a lot as you embroider.
- Backstitch: Backstitch works for embroidery. Backstitching produces a thin line of stitches which are perfect for outlining in almost all embroidery patterns
- Starting/stopping: there are several techniques you can use to end your backstitch. However, the simplest method works best- just tie a knot.
Related Questions
Can you embroider without a hoop?
Yes, it is possible to embroider without a hoop. Hoops basically help to stabilize your work. If you can stabilize it using another method, you won’t be needing a ring for your Embroidery. Instead, you have a way to maintain a decent level of tension on your fabric to prevent it from puckering and clamping.
An alternative to hoops is scroll fabric. They are perfect in maintaining fabric tension, scroll fabrics are also hands-free. Conversely, you could also use your hands to hold it down
Can I use a standard thread for Embroidery?

Yes, you can. However, a regular thread is a little thicker, and it may pile up on you as you embroider. A standard line gives you more coverage than embroidery varieties.
Embroidery threads and sewing threads are two types of floss that are used for sewing. The key difference between embroidery thread and sewing thread is their texture. Embroidery thread is a particular type of thread used for embroidery work. It has a unique sheen, whereas most sewing threads do not have a glow.
Crafting has always been a deep-seated passion of mine, one that has flourished and evolved over the years.
I've dedicated considerable time to both studying and practicing in the realm of fashion and sewing, amassing a wealth of experience and skills.
It brings me great joy to share these insights and experiences with you all, hoping to inspire and foster a similar passion for the art of sewing.
- How To Hem Chiffon With Tape - January 21, 2024
- How To Fix Ripped Jeans That Ripped Too Much? - January 9, 2024
- How To Make Pants Waist Smaller Without Sewing? - January 8, 2024


