

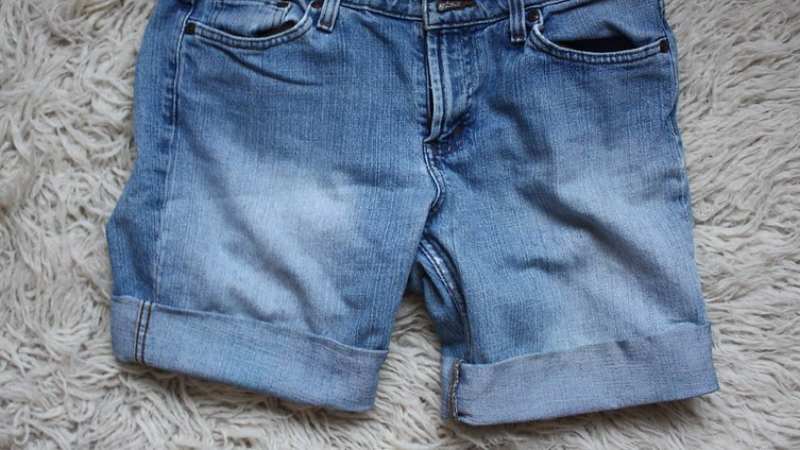
How To Make Shorts Smaller Around The Thighs?
As summer is now here, you need to break out a pair of your favorite shorts for your trips to the beach. To make sure that your outfit is totally on point, you might need to make some alterations. Fitting your shorts around the legs is important.
Sometimes, you can’t find the shorts you like in the perfect size. A great way around this is to get a pair of large shorts and then make them smaller around the legs. There are easy ways to do this and that’s what the focus of this blog will be.
Taking In The Crotch Area of the Pair
Contents
In this guide, you will learn about the two easiest ways to make shorts smaller around the legs. The first one is very easy and can be done by novices as well. The next is slightly advanced, but you will be able to do it with a little practice also.
The simplest and most efficient method of slimming your shorts near the legs is to take in from the crotch area. The side seam method is difficult to do and the adjustment is also more noticeable than this simple alteration.
Step 1: The first thing you need to do is wash and dry your shorts properly so that they do not shrink after you’ve altered them and washed them. After they’re dry, you should run them over with an iron so that they lie down flat with the creases visible.
Step 2: Turn the pair inside out and lay it on a flat surface. Iron it out once more and make sure that the front and back crotch areas are lined up in a straight line. You need to take in a small area around the crotch of the pair.
Step 3: While taking in, you will need to sew up this area so that your shorts become slimmer around your legs. The first step is to hand sew it and after it’s perfect, you need to use a sewing machine. Then you can apply all of the remaining final touches nicely.
Step 4: Apply pins to the area so that you know where to sew. This is a good idea especially if you are new to the world of DIY tailoring and alterations. With enough practice, you’ll soon be able to do it by sight without needing any pins at all.

Step 5: The next step is to sew the pants around the pins and remove the pins one by one as you do so. When you are done with the sewing, you should try on the pair and see if you have gotten the results you were originally looking for.
Step 6: In case the fit is not right, you can take out the thread and readjust it as many times as you like. The tightness of the fit is going to depend on the size of the area that you pin. Hand sewn stitches are very easy to remove.
Step 7: Lastly, when you are happy with the fit, you can use a sewing machine to stitch the area up in a more permanent manner. This step is optional and you don’t need to go out of your way. Do it if you don’t have a machine already.

This is one of the simplest and most hassle-free methods that will let you adjust the fit of your shorts. It is less noticeable than a side seam and it is also very easy to adjust. You can do it very easily with a needle, thread, an iron and pins.
Using the Side Seam and a Seam Opener

Another reliable method that you can use to make your shorts slimmer around your legs is to take it in using the side seam. To that end, you will need a seam opener to adjust the shorts’ existing side seam.
Follow these steps to the letter so that you can take in your oversized shorts easily and have a lovely time at the park or at the beach this summer. This method is slightly advanced but it is fairly easy – so you’ll be able to get it done very well.
Step 1: Use a seam ripper to take out the side seams of your shorts. Next, put on the pair of shorts and apply pins in such a way that the width of the shorts is just right. Do this for both and continue until it is even and right.
Step 2: If you feel like you need to take in the waist of your shorts as well, then you need to rip the bottom edge of the waistband. Later, you can bunch it in and then take in the waist of the shorts and make it slimmer as well.
Step 3: Make sure you get a type of string that is tough and will not be very noticeable. If you are working with jeans shorts, then you should consider using a spool that is a mix of cotton and polyester. This will make the alteration look natural and beautiful.

Step 4: If you use a sewing machine, then you will be able to sew up the new seams very easily. Use the seam guide on your machine to ensure that you’re sewing in a straight line. Remove the pins as you go along to ensure that the seam holds.
Repeat this step for both legs of your shorts and you are going to be done. This is a little hard to do because not everybody has access to a sewing machine. If you have access to one, then a seam ripper and some pins can fix the problem easily.
Step 5: You might need to make some alterations to the waistband of your shorts – for which you need to get a pair of tough fabric scissors. Bunching in the waistband will let you take in the shorts and make them slimmer as well. That’s all you’ll need to do.
This has been a simple and in-depth description of the two best methods that you can use to make your shorts slimmer around the legs. Oversized shorts are cute but they can be very weird and uncomfortable to wear outside. Simply taking them in will fix all of your problems.
The first method is ideal for people who want to do a quick DIY job and don’t have access to a sewing machine. The second method is best for people who want a more permanent solution. Just one thing is that they should have access to sewing machines, seam rippers, fabric scissors and all that stuff.
How Should You Use a Seam Ripper Correctly and Fast?
A seam ripper is a must-have tool that any DIY expert needs to have. It will let you take out seams and take in/let out your clothes very easily. Using it correctly and fast is a very important task.
It’s a good idea to purchase a seam ripper that is quite large in size and has an ergonomic grip. You should turn your garment inside out with the seam facing you. Slip the pointy end of the ripper between the threads and tug them out to undo the seam.
Once you have ripped out one of the threads, the rest will start to unravel very quickly. Stick the ballpoint end into the rip and pull it with some amount of force. All of the little threads in the seam of your shorts will be undone in a few seconds.
How to Choose the Best Thread For Your Sewing Project?

Different sewing projects will require different kinds of thread. If you’re hemming your pants, you will need a certain kind of thread. If you’re letting it out or taking it in, you will be needing some other kind of thread.
The best course of action is to choose hybrid threads – which are a mix of synthetic and natural fibers. You will be able to enjoy the best of both worlds if you choose this kind of thread. Polyester is one of the most popular choices while working with DIY projects.
Depending on the material of your shorts, you will also need to choose a specific color. Try to pick a color that is close to the thread used in the original seam of your shorts. For a crotch fit, you should use a thread that cannot be discerned very easily.
Final Thoughts
This has been a very complete and in-depth guide to help you take in your shorts. You can now prepare them for all of your upcoming summer plans. With the help of a few tools, you will be able to take care of all your clothing DIY projects.
Instead of spending a whole lot of money going to the tailor, these helpful hacks are going to let you take care of all your DIY clothes alteration at home. You can take in your pants, hem them, let them out, etc. with a remarkable amount of ease.
Crafting has always been a deep-seated passion of mine, one that has flourished and evolved over the years.
I've dedicated considerable time to both studying and practicing in the realm of fashion and sewing, amassing a wealth of experience and skills.
It brings me great joy to share these insights and experiences with you all, hoping to inspire and foster a similar passion for the art of sewing.
- How To Hem Chiffon With Tape - January 21, 2024
- How To Fix Ripped Jeans That Ripped Too Much? - January 9, 2024
- How To Make Pants Waist Smaller Without Sewing? - January 8, 2024


