

How To Sew Leather Patch On Hat
Ever wondered what exactly goes into the process of manufacturing leather patched hats? Wouldn’t it be great to be a part of that beautiful craft-behind-the-scene? In case your interests have got you fascinated by the thought of it, read on.
Leather-sewing and fabric sewing are different and unique. However, working on custom leather-patched hats means a blend of both the artwork. Plus, the appeal of leather patches on hats has become really popular in sports and other industries.
How To Sew Leather Patch On Hat?
Contents
You need to arrange the essential materials. Prepare the design you want to create. The most crucial step is to make the patches and sewing the patches. That’s all you need to do.
The thought of sewing a patch on a cap (whether it’s basketball, knit, or trucker’s hat) might highlight the significance of a sewing machine.
It may give a lot of control to your work. But that only makes your work slow and intimidating. On this note, here’s your tutorial guide to understanding the process in a simple manner. Read on.
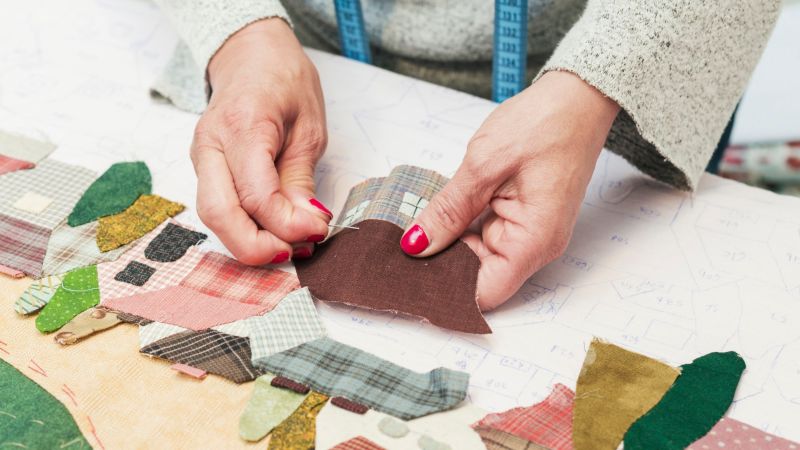
Steps to Sew Leather Patches On Hat
A fashionista’s eye can significantly demonstrate the appeal of leather patches on any accessory. Be it a watch, a bag, or a hat! Leather sounds super-cool in any form of closet stuff. In this case, leather patches embroidered on hats look fantastic.
As an embroidery professional or beginner, the simplest way you can customize a hat is by adding leather patches on it. Whether it’s a trucker’s hat, basketball cap, or knit cap, you can modify your preferred design accordingly.
And how you proceed has been outlined in this post. Read further and learn the step-by-step method.
Materials to Prepare

Just in case you want to try your hands on the leather patch design, you’d require these materials for sure:
- 24 Inches Masking Tape
- Self-Healing Cutting Mat
- Leather
- Scraper
- Art Knife
Some Quick Notes:
To design the leather patches, create the artwork first. Use a low-to-medium masking tape to mask your material. When laser cutting the patches, ensure that you’re protecting the leather face. So, here are the detailed steps:
Step 1: Gather Supplies And Materials
Personalizing a hat with a leather ensemble is not a tricky process. To start with, gather materials like a hat and leather pieces. You’d need a digital file of your preferred design and a laser cutter.
What’s best recommended is a neutral-colored hat! Take light grey, brown, or black, for example! For the leather panel, you can choose either brown suede or white. Don’t forget to get some adhesives!
Quick Recommendations:
Ensure that you choose a recommended leather piece. Just in case you’ve brief experimentations with leather before, ensure that you safely choose the leather. Make sure that it’s no faux leather.
Step 2: Preparing The Design

You may be a sewing expert and also have knowledge about Photoshop or Illustrator. Maybe that’s the reason why you’ve come up to experiment with leather patches on hats. Thus, now’s the time to work on the design!
Just in case you opt for a design with fine details, ensure that you choose a black background. As a matter of fact, small areas that don’t get etched should be surrounded by areas that get etched.
At times, these require getting beefed up when it comes down to laser etching. This compensates for laser beam charring areas around them.
One final note about the operation is to consider the sizing before starting off with the design. What’s recommended is 2.5 inches in size for an average-sized cap or hat!
Step 3: Taping And Masking The Leather
While etching a massive portion of leather, it’s a great idea to mask it with tape. You can use a painter’s tape in order to prevent residue and smoke from the non-etched surface!
Step 4: Laser Etching Patches Of Leather

Leather-lasing is a simple process, although you need to take a couple of things into account. Let’s say that there’s a sub-process where more energy is required! In such cases, it’s definitely the cutting procedure. So, it’s recommendable to do it carefully.
Just in case you’re etching details instead of etching around those intricate details, you perhaps may avoid masking in former steps. What you can do is play around to watch what’s working best for the design.
But here’s a cautionary story:
To speak literally, real leather is cowhide. Ever scorched the knuckle hair when toasting marshmallows over the bonfire or messing with fireworks? it’s familiar to you.
Didn’t you get that putrid smell of burnt hair? And the bad news is that your skin and hair are made of similar proteins, like keratin. This means laser etching smells quite similar to your burnt hair. So, be careful while performing it!
Step 5: Cleaning The Patches
Now is the time to clean the leather up! If you mask the design, what you require is to remove itsy-bitsy tape pieces. When you find any smoke residue, use a paper towel to wipe the area off.
Step 6: Preparing For The Sewing Process

One thing to understand is the fact that all caps hats are different. And only one rule goes for it:
‘If You Can Hoop Your Cap, You Can Sew It Too!’
For this, you’d require the materials like:
- Clips
- Paperclips
- Safety Pins
- Tape
While sewing the leather patch on a baseball cap, the cap’s crown will have a massive seam down its middle portion. In such cases, even with the use of a cap driver, the area tends to get pushed around while stitching. What you can do is use a cap-backing!
On the other hand, knit hats often get hooped on the same driver used for the baseball caps. However, using some pieces may also be possible with some clips. To learn more, follow the next step.
Step 7: Make Underlay Stitches for Sewing the Patches
Once you have the hat with you, you need to use the embroidery machine to move the hoop easily sans interference. Now is the time to lock backing to your cap! For this reason, make underlay stitches.
There are several features in the digital machines that create underlay, allowing right from the patch’s center and working outward. This way, the cap stays locked down well to backing prior to applying the patch.
An alternative method to produce underlay is by using tree underlay. For this reason, you can start right from the bottom or middle of your hat. As you begin, digitize the running stitches in a pattern similar to a fan.
Your stitching intent should be such that you smooth out your hat as your machine sews. What’s important to note here is to start working towards the edges.
Some Quick Notes:
You can also add some adhesives in order to make the patch stronger. For this reason, use glue before you start stitching.
Hold the patch on the desired surface of your cap. Put the required amount of glue and leave it for a time frame. Upon then, you can proceed with the stitching process.
So, that’s it. You’d absolutely be thrilled with how your cap looks! But to ensure a perfect design, here’s presenting some facts.
What Are Different Types Of Leather Patch Shapes?
The different types of leather patch shapes are rectangle, square, circle, and more. Additionally, you can also create a customized shape in accordance with your preference!
What Colors Are Perfect For Leather-Patched Hats?
When you opt for intricate leather patches, then it’s better to opt for a neutral-colored hat. You can go for colors like white, beige, black, brown, etc.
Why Choose Sewing Over Adhesives When It Comes Down to a Leather Patch on Caps?
Leather patches are always more preferable over sticking them on caps with glues or adhesives. And for a sturdy, long-lasting, and durable design, you should always choose sewing over any glue or adhesive.
Crafting has always been a deep-seated passion of mine, one that has flourished and evolved over the years.
I've dedicated considerable time to both studying and practicing in the realm of fashion and sewing, amassing a wealth of experience and skills.
It brings me great joy to share these insights and experiences with you all, hoping to inspire and foster a similar passion for the art of sewing.
- How To Hem Chiffon With Tape - January 21, 2024
- How To Fix Ripped Jeans That Ripped Too Much? - January 9, 2024
- How To Make Pants Waist Smaller Without Sewing? - January 8, 2024


