

How to Embroider Realistic Eyes
The fragileness of the eyes makes them one of the trickiest parts of a hand sewing or embroidery project. You need a fair amount of practice, along with patience. Once you master the technique, you can have those beautiful, realistic eyes for your child’s doll. They can even make a bizarre design for any shirt or garment.
There are various ways to embroider the eyes. They may differ depending on the thread and its thickness. You can elaborate on a knitted, crochet, or a simple fabric. Either do it by hand or machine. I will cover the basics of each method here alongside the type of stitches you can use.
How to Embroider Realistic Eyes?
Contents

Begin by deciding the precise arrangement of the eyes and their shape. Then, mark them. Use a fabric marker which you can easily remove the ink afterwards. You can create an eye template, so you have an idea of the eye shape. Usually recommended if you are working on a doll or object. Now, it’s time to embroider and bring those stitches to life!
Steps to Embroider Realistic Eyes by Hand

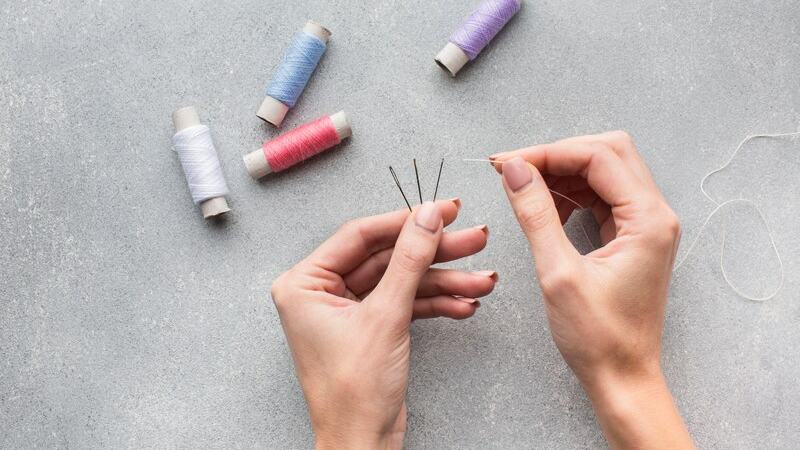
Step 1: Prepare All Your Supplies
You will usually need an embroidery hoop, threads of different colors, a needle, marker, and a piece of fabric.
Step 2: Position the Eyes Carefully
Try different variants first before selecting the final placement. How do you want them to come upon through position? For instance, sweeping, large eyes give an unsuspecting and innocent look. Eye placement varies on the human age. To ensure the eyes are on a par distance, put a sewing pin in the face. Measure either to the left or right eye using a sewing gauge.
Step 3: Highlight Features
Outline the features with a fabric marker or water-soluble marker. It is very crucial if you don’t want to end up with differently formed eyes. As I have mentioned earlier, you need to use an eye template for this. It could be anything – a small piece of paper, a portion of felt, cardboard, etc.
Step 4: Sew a Stitch
Push the needle back through your fabric slightly far-off from the end of the last stitch. Then, poke around the needle through the hole formed by your preceding stitch. The thread should now be between these stitches.
Step 5: Continue Stitching
Keep on stitching around the iris while not touching the top eyelid area. Create straight stitches alongside each other to fill the pupil. Here, you’ll need to use a black thread.
Step 6: Try Different Stitches
Do a long stitch, a short one, and finally another long stitch for the iris. Use a grey thread. Just continue along the way.
Step 7: Complete the Stitching
Fill in the rest of the eye. Start at the end of the perimeter you embroidered around the iris. You can use a blue thread or any color you find best to get an appealing finish.
Step 8: Sew Eyelids
Using the black thread once more, sew within the eyelid’s edge. Stitch as you would to the edge of the iris.
Step 9: Complete Other Eye Parts
With a new color at hand, stitch from the top eyelid’s corner rim up to the centre of the eyeball. Repeat for the second eye, and you’re done!
To remove the remaining inks, spritz the area with water. Dab with a clean paper towel and that’s it.
How to Embroider Realistic Eyes by Machine
Step 1: Choose the Stitch
Play a bit with the width and length of your stitches until you settle on the right one. Have a sample stitch on a piece of fabric. Make a note of the width, height, and stitch number.
Step 2: Get the Supplies Ready
Once ready, you are all set to stitch the eyes. But first, ensure the bobbin is full to promote smooth stitching until the end.
Step 3: Start Stitching

Place the block inside the sewing machine. Pull down the needle directly above the eye. Lower the presser foot afterwards.
Step 4: Try Backstitch
Sew one oval shape. Stop stitching as soon as the needle gets to the base of the oval. Do a backstitch. Repeat on the other eye.
The machine offers a less realistic eye compared to hand-stitched ones. You can use it for dolls or animal stuff. An embroidery machine is most fitting, but a regular sewing machine could also do the job. However, it should have some decorative stitch options. Don’t forget to have a stabilizer! It could be a combination of block batting and fusible adhesive tape. You may need to modify the tension level as well.
And just a simple tip, do not restrain or pull/push the fabric while getting through the machine. Allow it to flow freely on its own. Otherwise, you will create uneven eye lengths. Go gently for each stitch you make. Both threads must lie as evenly as possible.
Different Types of Stitches to Use
Embroidery is considered beautiful art. Anyone has their own ways of how to do things. And interestingly, learning how to embroider realistic eyes opens up many different techniques. They complement the personality of a garment or stuff, besides your preference and skills.
1. Backstitch
Beginners will find backstitch easy to learn. It produces lines and is commonly used to border shapes. It’s also ideal if you want to add refined details to an embroidered picture. Backstitch is carried out back and forth and is described as the most durable out of all the basic stitches. And when it comes to eye embroidery, you can create closed or drowsy eyes. It joins a line of stitching for resistance and strength.
2. Satin Stitch
Unlike backstitch, a satin stitch may require more time and some embroidery skills. Those full round doll eyes are due to the incredible effects of satin stitch. It allows you to embroider the white of the eyes as well as its pupil and iris.
Use it along with a backstitch if required. To do this, delineate the eyes using backstitches and then cover the whole section with a satin stitch. There are two ways to embroider eyes with satin stitch. First is embroidering directly on the fabric and second, embroidering on a teensy cloth.
3. French Knot
This form of stitch has proven to be an exciting embroidery technique for both beginners and experienced stitchers. Create eyes, whether on an object or fabric. However, you need to be watchful of each stitch as they tend to tangle. The French knot is quite complex in general, so starters can try other alternatives like the other stitch methods we have here.
4. Cross Stitch
Another easy stitch that anyone can complete in one sitting. Cross stitch is suitable for filling in a fabric material or the entire project. Using it for embroidering eyes will enable you to try varying colors of your choice.
For example, use some colored stitches in the middle of the eye. And to help you make a more substantial eye, go for various white stitches. Be bold and try variant colors for a more creative finish.
5. Stem Stitch
The stem stitch is also crucial for those who are still starting in the embroidery. Use it to form fine lines such as the brink of a window or the flower stem. While for shaping eyes, it traces around the eye edges. It can be used for curves and straight lines. It is not difficult at all and is quite identical to the split stitch method.
How Many Floss Strands Should I Use to Embroider Eyes?

When it comes to eye embroidery, you can use one to three threads. If you feel like doing finer details, then a single thread will do. For a quite thick finish, two threads of floss may be ideal. Again, it depends on the fabric and your own preference.
What Is the Best Stitch Technique to Embroider Eyes?
The French knot is largely used when embroidering eyes, especially when working on stuff. It helps you to create a little thread ball to epitomize the eyes. However, its intricacy may discourage starters from trying it. Hence, there’s no best stitch technique. Embroidery is typically done in a person’s own style using any stitch method.
Crafting has always been a deep-seated passion of mine, one that has flourished and evolved over the years.
I've dedicated considerable time to both studying and practicing in the realm of fashion and sewing, amassing a wealth of experience and skills.
It brings me great joy to share these insights and experiences with you all, hoping to inspire and foster a similar passion for the art of sewing.
- How To Hem Chiffon With Tape - January 21, 2024
- How To Fix Ripped Jeans That Ripped Too Much? - January 9, 2024
- How To Make Pants Waist Smaller Without Sewing? - January 8, 2024


