

How to Monogram A Shirt With an Embroidery Machine
A monogram is a design that combines two or more letters elaborated in a beautiful font. Most monograms are made out of a person’s initials or letters taken from a business’ name. They are similar to logos with some inherent meaning attached to them.
Monograms are generally placed on a piece of clothing to beautify it while marking it as the property of the monogram owner. You can monogram t-shirts, caps, handkerchiefs, stoles, quilts, towel, bag, etc. Monogramming is commonly used by hotels to mark their linens. It is also used by big brands to mark their products.
How to Monogram a Shirt With an Embroidery Machine
Contents

Monogramming a shirt using an embroidery machine is an easy task if you know how to Monogram and how to use a machine to embroider the design. There are multiple steps in the process like drawing the monogram, setting the machine and then embroidering it. Sounds interesting? In the next section, let’s understand the steps on how to add a monogram to a shirt with an embroidery machine.
Steps to Monogram a Shirt With an Embroidery Machine
Create a Design in the Machine
This is the very first step in making a monogram embroidery. You have to create a design. Embroidery machines come with preset designs, lettering and an easy to use software that makes finalizing a design and then embroidering it very easy.
At this stage, you have to input the letters you want to monogram along with the font and size of your design. Make sure the size you choose agrees with the area on the shirt where you want to display the monogram.
Choose an Area
This step can come before or after you create a design. You have to choose a spot on your shirt where you would like to showcase your monogram. Make a straight bottom line at the spot so that you get a baseline for your alphabets.
While you are at it, also choose the color of the thread. Choose a color that pops out on the base (shirt) color. You do want your embroidery to blend in.
Place the Hoop
An embroidery machine has a hoop that usually decides where your design will go. Mark the center point of your monogram and strategically place the center of the hoop on it. This task will take some understanding of the machine and its working. If you are worried that your fabric will move while you monogram, place a stabilizer at the backside of your chosen area. It will stabilize the fabric and help in avoiding issues like puckering.
Start Embroidering

Secure the hoop in place and start your machine. You do not have to do anything else now, the machine will do its job. Since, this part is totally executed by machine, make sure everything is in place before you switch on the machine. When the embroidery is done, detach the hoop. Cut the extra thread and remove the stabilizer from the back (if you had placed one). You have successfully monogrammed a shirt with an embroidery machine.
How to Avoid Embroidery Puckering?
Puckering is a common problem with machine embroidery. It happens when the fabric moves around during the embroidery process. When your machine is stitching, if your fabric slightly moves with the needle, it will bunch up at one place. Hold the fabric consistently flat to reduce the chances of puckering. You can also adjust the thread tension to reduce this problem.
What Kind Of Fabric Do You Use For Embroidery?
Embroidery, be it by hand or by machine, requires an even-weave, tightly woven fabric so that the stitches and design remain intact even when the cloth is put to use. Materials that are counted as even-weave are cotton, linen, rayon, and polyester blends. Hemp and bamboo are also known as even weave materials.
What are the Other Methods of Monogramming on a Shirt?
An embroidery machine is not the only way to monogram a shirt. Long before embroidery machines came into existence, shirts and other clothes were monogrammed by hand. There is another popular method of monogramming. This is not exactly embroidering but can effectively monogram a piece of cloth. It is known as monogramming with vinyl and needs a computer and a software to execute. Following is how you can embroider a monogram with hand or print using vinyl.
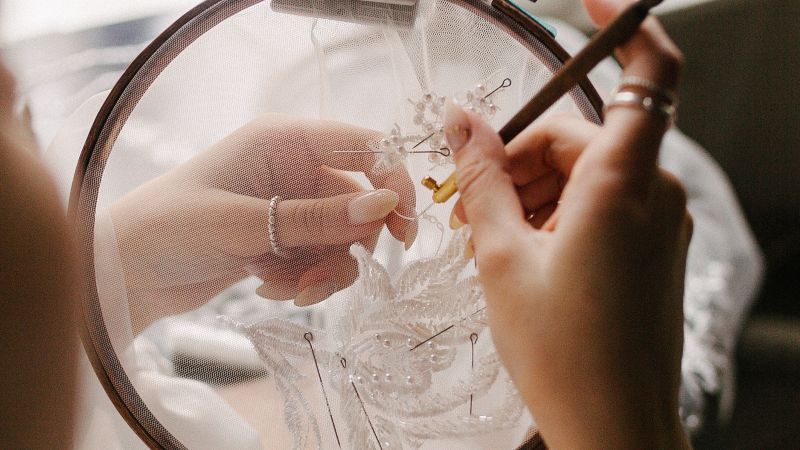
Monogram Embroidery by Hand
Embroidering by hand is a simple process but it is time consuming given the intricacies of the process. If you are looking for a creative hobby, embroidery can be the way to go for you. Here is how you can do it.
Create a Monogram

Creating a monogram needs creativity. You will have to use a free hand and your imagination to create a monogram that consists of one or several letters in a beautiful design. Experiment with different fonts and cases to beautify your monogram. You can also stylize by drawing borders and shading certain parts of the alphabets.
No matter how and what you write, you have to keep the size in mind. You have to draw the monogram in the exact size you want on the shirt.
Finalize the Area on Shirt
Once you have your design ready, it’s time to choose where you would like to place the monogram on the shirt. Choose a place which has at least 2 inches around the design. This space is needed to fix the embroidery hoop.
Now, you can transfer the design from paper to the fabric. You can do this by tracing over the design by placing a carbon paper between your design and the shirt. Ensure that you do this tracing on a hard surface.
Embroider by Hand

Now that the design is traced on the shirt, the only thing left to do is to embroider by hand. Fix the embroidery hoop around the design and tighten it. Choose a thread color and begin. Start by outlining the letter with split stitch and then fill the alphabets with the satin stitches. Once you are done, cut the extra thread and your monogram is ready. You can learn split stitch and satin stitch on the internet.
Monogramming With Vinyl
Do you know that Vinyl is a great way to monogram your shirt? This process does not require any sewing skills, rather you will need a computer, a vinyl machine and software to pull off this method. The Vinyl method lets you portray sophisticated designs with ease. Here is how you can use this method to create a beautiful monogram on a shirt.
Create a Design
You can use a software to create a monogram on your computer. There are many monogramming softwares available that you can download and use for your design. If your monogram has multiple alphabets choose the ‘Weld’ option to make them look like one piece rather than multiple pieces.
Cut the Design
For this step you need a vinyl cutting machine and vinyl sheet. This machine takes a design as input and gives out a print on the inserted vinyl sheet. This task may sound confusing but you will be able to do it with ease with the right software and an easy to use vinyl machine.
Transfer the Vinyl to the Shirt
This is the last step of the process where you transfer your vinyl monogram onto your shirt. Place the vinyl design on the shirt. Find the center spot of the design to avoid any crooked monograms. Cover the vinyl sheet with a multi-use paper and then place a heat press machine or an iron over the paper. The heat press machine makes a beeping sound when the transferring is over. With an iron, you will have to take a guess. Remove the paper, and remove the additional layer of vinyl to check out your design. Voila, you are done.
You can take up monogramming as a hobby if you master one of the above-mentioned methods. It is a creative and uniquely satisfying process that can also help you build a business out of it.
Crafting has always been a deep-seated passion of mine, one that has flourished and evolved over the years.
I've dedicated considerable time to both studying and practicing in the realm of fashion and sewing, amassing a wealth of experience and skills.
It brings me great joy to share these insights and experiences with you all, hoping to inspire and foster a similar passion for the art of sewing.
- How To Hem Chiffon With Tape - January 21, 2024
- How To Fix Ripped Jeans That Ripped Too Much? - January 9, 2024
- How To Make Pants Waist Smaller Without Sewing? - January 8, 2024


